
Room Slides
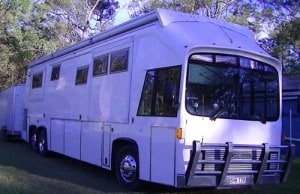
We will be using a suspended system for our room slides, as the pictures in the gallery show. This is far superior than having things buried under the floor, is less susceptible to being out of level, as well as being strong and priced well. We would prefer 24 volt motors but they are not available, however we can get around that. Easier to operate and seal, we believe this is the way to go for sliding rooms. Our slide out rooms are on the way and will be here around the end of June, by which time we will be well and truly ready for them. Framing for each is complete, just need the shipment.
We are fitting the slide rooms quite forward, opposite each other. They are glide rooms more accurately than slide rooms, and float above the floor, not touching it. The floor or platform for each one is 75mm high, but we will have room to walk between the 2 when travelling. When stopped, press a button and the lounge/dining area opens up a massive 5 feet, or over 1 1/2 mtrs. The use of moveable furniture, combined with a built in dining area in one glide room, means 8 could be comfortably seated at the dining table. The other will have a pull out bar !
no images were found
It is really nice to be able to start adding material to these pages after mainly working on the frame and roof lift pages. Sometimes it is difficult to work out where something should go, as with the vertical exhaust stack we have constructed, but you should not miss anything if you flick over the main pages. The glide rooms or more correctly floors which is what the makers call them, arrive tomorrow all being well (second week of July) and we should be ready to get straight into them. As we are currently finishing off the radiator and new hoses and rear insulation, which needs two more days, the timing could not be better.
So we have added some “chunky” steel to the tops of the 3 slide areas as it is necessary to beef up what was the top window rail when you have a couple of metres with no posts. We have probably gone over the top a bit, but would rather be that way than too light. The material we have used is 130mm x 10mm flat mild steel. We pretensioned it as it was put into place, ensuring the top window rail is nice and straight when it settled down. Some pics are below, we probably won’t have much else to add here until the glides arrive.
no images were found
Glides will be delivered tomorrow, woooohooooo!! Can’t wait to start getting into them. We had never actually fastened the last three sheets of structural formply down (glued and screwed) so we polished this job off to be sure we were ready for them when they arrive.
no images were found
Glide rooms have arrived. We have unpacked and done a “tack” opening in the coach to see where we are at. Now is the time to work out the sealing options. We are very happy about how simple it is to fit to the prepared hole, and how little enegry is needed to move the room in and out. Still don’t like the 12 V motors but we have plenty of them lying around, so not a major. just happy to get started in this area.
no images were found
The slide rooms have got our attention at the moment, we have been busy framing up the “house” for each one. It has been necessary to modify the side of the coach to a vertical wall where the rooms are, to gain maximum travel. The room gained by including these rooms is amazing and well worth the effort and expense. We are extremely happy with the mechanism, the floors themselves leave a lot to be desired, we could see heaps that could have been done better so have modified them ourselves. More on that as those pics are available.
no images were found
As mentioned above, we have reworked the floors themsleves for a better result, they have been built down to a price, not up to a standard, which is unfortunate, as the swing mechanism is top class. We have already come up with a design far superior to this, just from talking about what we have been doing while untertaking the install. When you consider the difficult communication with the company, and I know some of you have experienced this, the lack of decent instructions (many parts not even mentioned) the poor packing which has resulted in damage to the finishing pieces and the generally poor finish of the floors, (meaning you really have to rework them) it is pretty dissapointing. Our third slide will be our own design and far superior to the first two !
no images were found
Bit of a mixed bag for you today, we have been refitting the Liftco slides after the fibreglass people fitted some strips underneath the Liftco gear, so we will have an unbroken fibreglass skin over the vehicle. We also took care of the window steel on one side of the bedroom, and started the bed slide out that we talked about in the news section. Bill has also been busy making the new entrance door, there are a couple of pics in the gallery below. We get the glass skins for the slide room houses tomorrow so they will need to go on immediately so the top joins can be fibreglassed, the others are covered by an extrusion.
no images were found
The slide rooms have been attached and glued to the floors for good and the walls and ceilings of fibreglass have been glued on. A little work remains to finish the corners, after that they are ready to fit to the coach
no images were found
Today we fitted the slide rooms. We are STOKED ! The amount of room the opposing slide rooms open up in the living area is almost unbelievable. So much so we have decided to add a cocktail bar to Vanishing Point ! Forget those old chestnuts about leaks and wind noise. Fit a decent seal and replace it every couple of years, costs SFA and you will have the benefit of all this extra space. FANTASTIC !!!!!!!!!! WOOOHOOO!!!! You get the idea ? And they work beautifully, push in and out with your pinky ! The mechanism is excellent, can almost forgive the fact that we felt the floors themselves could have been finished better.
no images were found
Today we insulated the slide rooms and made the frame for the seat. Ordered some different height table legs to match the new seating height, and chased down the bar stools for the bar. They are gas lift and are perfect for the other side of the table when we have more than 3 to eat, or great for sitting at the bar when set high. The table will seat 8 easily when in the up position. We are not lining any areas yet, until the outer fibreglass skin is on and all gel coat spraying has been completed. We also secured to polyurethane foam for the fridge/freezer which will be hidden in the bar.
no images were found
SLIDE 3
We have started on slide three, the bedroom one. We are doing this in a manner we have not seen before, using supported rod and bearings. It has worked superbly. Because of Mike leaving Bill has been working really hard and has had little time to post here. However there are some uncaptioned photos in this gallery to whet your appetite.
The bedroom slide room has been built, we will use the Liftco sealing system and outer extrusions, so it looks the same at the other slide on this side. Now it just needs final welding (instead of Bill’s crap tacks) and it can be glassed the same as the rest of the vehicle. Also the bin doors have been completed, photos of them tomorrow. They have been totally stripped and the locking system changed, which you will see in the future.
no images were found
Back working on the Liftco slide rooms, starting to trim the inside of them and add windows. also in this gallery are several pics of the doors which have been getting coat after coat of gloss urethane paint.
no images were found
WE have been asked for some more slide room seal detail, here it is below
no images were found